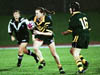
Women's World Series / Karen Shaw 2
All photography © RugbyLeaguePhotos.com